Directory / Custom Reports
Once you have gone through Reports / Directory / Exports and reviewed the process of working with the Report Designer you can follow these instructions to add Email and Cell Phone fields to your Directory. This tutorial will also help you learn how to add any other additional fields you might like to include, such as Status Codes, Birthdays, Anniversaries, etc. and can give you a better idea of the work-flow in the Report Designer.
How to Add Email and Cell Phone to a Directory
From The Initial Portal of Church Windows choose Membership and click Reports from the :
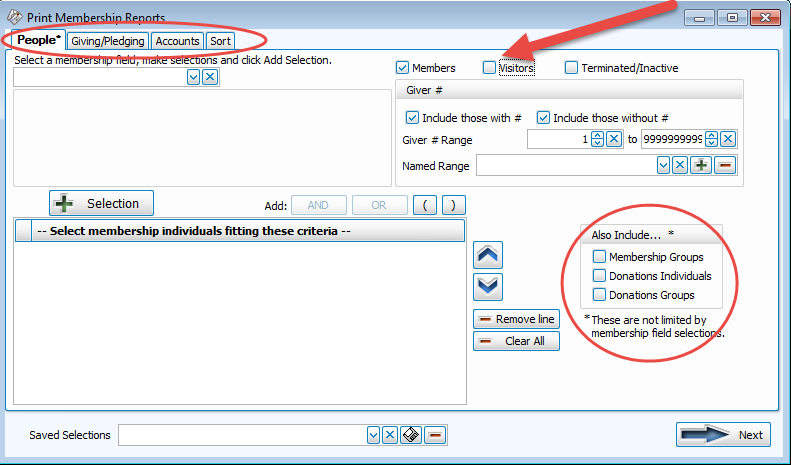
Step 1 — Select who should appear on the report:
- On the People Tab, remember that Directories do not require any search criteria, as they are already setup to only include those with
Include on Directory checked and a Directory/Report Order assigned. Therefore, simply check or uncheck the desired
Family Categories (or Categories) for your Directory and click:
- On the
Sort Tab
, in Sort Field 1 choose Name for an alphabetical sort (Sort Fields 2 and 3 are unnecessary in this case).
- When you're finished, click the → Next button.
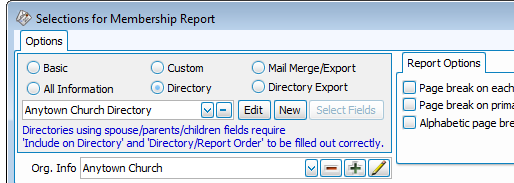
Step 2 — Select the report layout/format:
- Under Options on the top left mark the
 radio button to select Directory:
- Choose a Directory layout:
- Click the
 dropdown under Directory.
 - There are several different layouts included with the software for you to choose from and they all say [Template] then a descriptive name of what information the layout contains.
- Every layout includes: adult and children’s names, address, main phone, and alternate address information.
- None of the Directories will include contact information that has been marked Unlisted.
- We recommend selecting one of the layouts that is closest to what the Church wants for their Directory and then edit it to get all of the desired fields (like Cell Phone and Email).
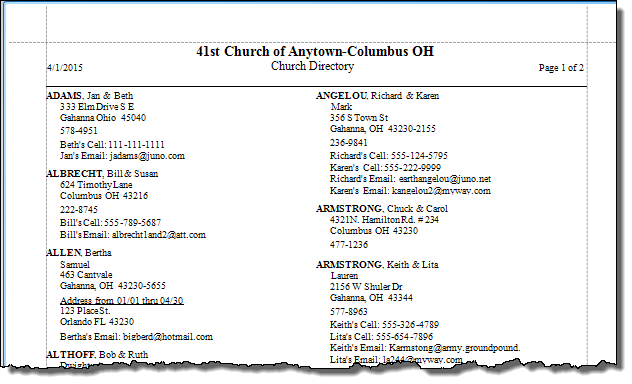
- Our example here shows the [Template] 2 Col Dir with Cell and Email.
- Click Print to view a
Print Preview of each template and decide which layout will work best for you.
Note:
It is NOT necessary to make a NEW Directory from scratch, unless you find that none of the templates included give you the basic framework you can customize to meet your needs.
- Click the
- After the Directory layout is selected, click the Edit button and the
Report Designer will open. This is where the Directory is built!
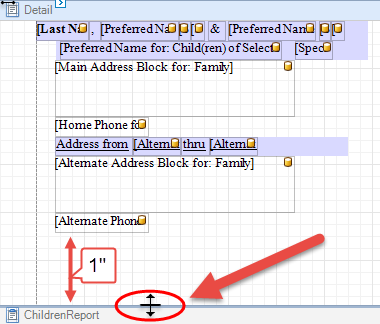
- If needed, make space to add an additional fields:
- Hover your mouse over the line above the Children Report section, the cursor will change to an up and down arrow.
- When it appears, click, hold and drag the line down about an inch to make the Detail section bigger:
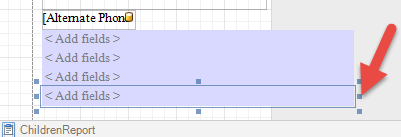
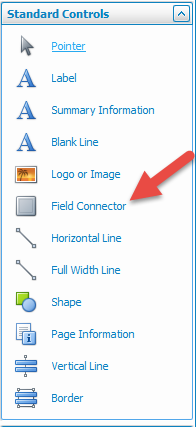
- Add Field Connectors from the Standard Controls menu at the right:
- Field Connectors are the bluish-purple colored fields which take care of the line spacing.
- Drag and drop the necessary number of Field Connectors below the last field.
- You may need to grab the center square to reduce the size of the field. The Field Connectors should not overlap in the gray "Space for repeating columns":
- Add a Personalized Label from the Data Controls section on the right for each field:
- Personalized Labels will add the Individual’s name along with labeling the field (Example: Rachel’s Email).
- One at a time, drag and drop four Personalized Labels, one into each of the Field Connectors:
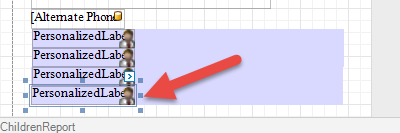
- Make the Personalized Labels shorter within the Field Connector by grabbing the center square on the label and dragging it to the left.
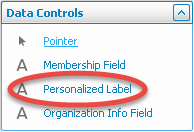
- Add each
Membership Field from the Data Controls section on the right:
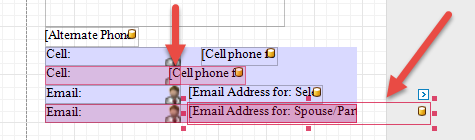
- Four total Membership Fields are needed (two Membership Fields for Cell Phone and two Membership Fields for Email Address).
- One at a time, drag and drop
Membership Fields into the Field Connectors, next to the Personalized Labels.
- After dropping each
Membership Field, the 'Pick a Membership Field' window will appear:
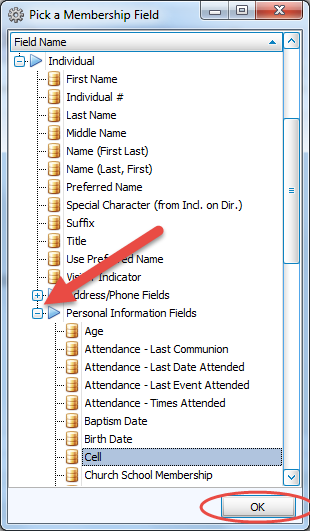
- Scroll down and expand the Personal Information Fields section.
- Scroll down further to select Cell or Email, respectively, and click OK.
- Be sure to reduce the size of the Email field by grabbing the center square on the label and dragging it back
- No pink/red should appear. If pink appears, some of the fields are either overlapping or extending too far and you'll need to adjust the fields to resolve the conflict:

- Set the Membership Fields to the corresponding Family Member:
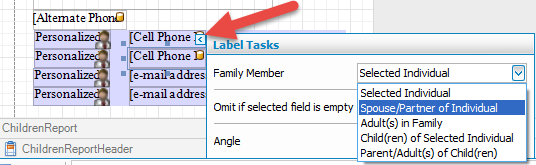
- Each time a Membership Field is added to the layout, it defaults to the Selected Individual (1 — Primary) in the family. Therefore, this needs to be changed to Spouse / Partner of Individual (2 — Secondary) on the second line for Cell and second line for Email.
- Click on the second Membership Field for Cell Phone.
- A small blue arrow
 appears above and to the right of the field, click on the arrow.
 - Label Tasks will open, change Family Member to Spouse / Partner of Individual (2 — Secondary):
- Repeat for the second Membership Field for Email Address.
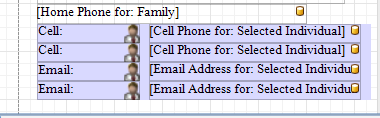
- Setup the Personalized Labels:
- Assign the corresponding Family Member and Omit labels for people that do not have a Cell phone or Email address in The Individual Record.
- You will assign one of each to
- Click on the first Personalized Label field for the Cell Phone.
- Then click on the arrow to open Label Tasks (same as for
Membership Fields above)
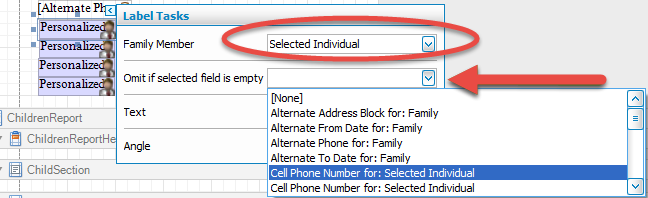
- The Family Member will be Selected Individual (1 — Primary) by default.
- In the box next to Omit if selected field is empty field choose "Cell Phone for: Selected Individual".
- This setting tells the layout that if there is no Cell phone, it will not print the name and the label:
Note:
The "Omit if selected field is empty" field should ONLY to be set for the Personalized Labels, NOT for the Membership Fields. If it is used for Membership Fields, the information on your Directory will NOT print accurately. - In the Family Member field, choose Spouse / Partner of Individual (2 — Secondary).
- In the Omit if selected field is empty field, choose "Cell For: Spouse / Partner of Individual (2 — Secondary)".
- Repeat for all four Personalized Label fields.
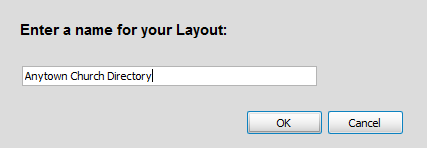
- Click the Save As button at the top left once you have your layout completely setup.
- Enter a name or edit the current name and click OK:
Note:
When naming a new report layout, keep in mind that you are creating a template which can be used for other reports with different data in the future, therefore names should NOT include specific dates or the search criteria you used to compile the report. Instead, the name should indicate what kind of information will be included in the report. - Exit out of the Report Designer.
- The saved Directory layout will now be listed in the drop box for use in the future when Directory is selected:
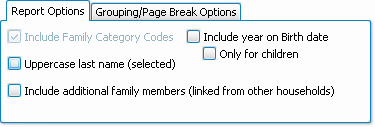
- There are several additional Report Options to choose from listed at the top right, check the box to apply the setting:
- Once you have made all of your selections, click Print to view a Print Preview and then proceed in sending the file to your printer. You can also Export most reports and/or Send via Email as a file to be used outside of Church Windows.
For further help, go to www.churchwindows.com to watch a video with instructions for building the Directory.